f you want to add some extra information to your invoices, such as purchase order number, remark, or project details, you can use the sell custom field feature. This feature allows you to create a custom field that will appear on your sales page and on your invoices. Here are the steps to set up and use the sell custom field feature:
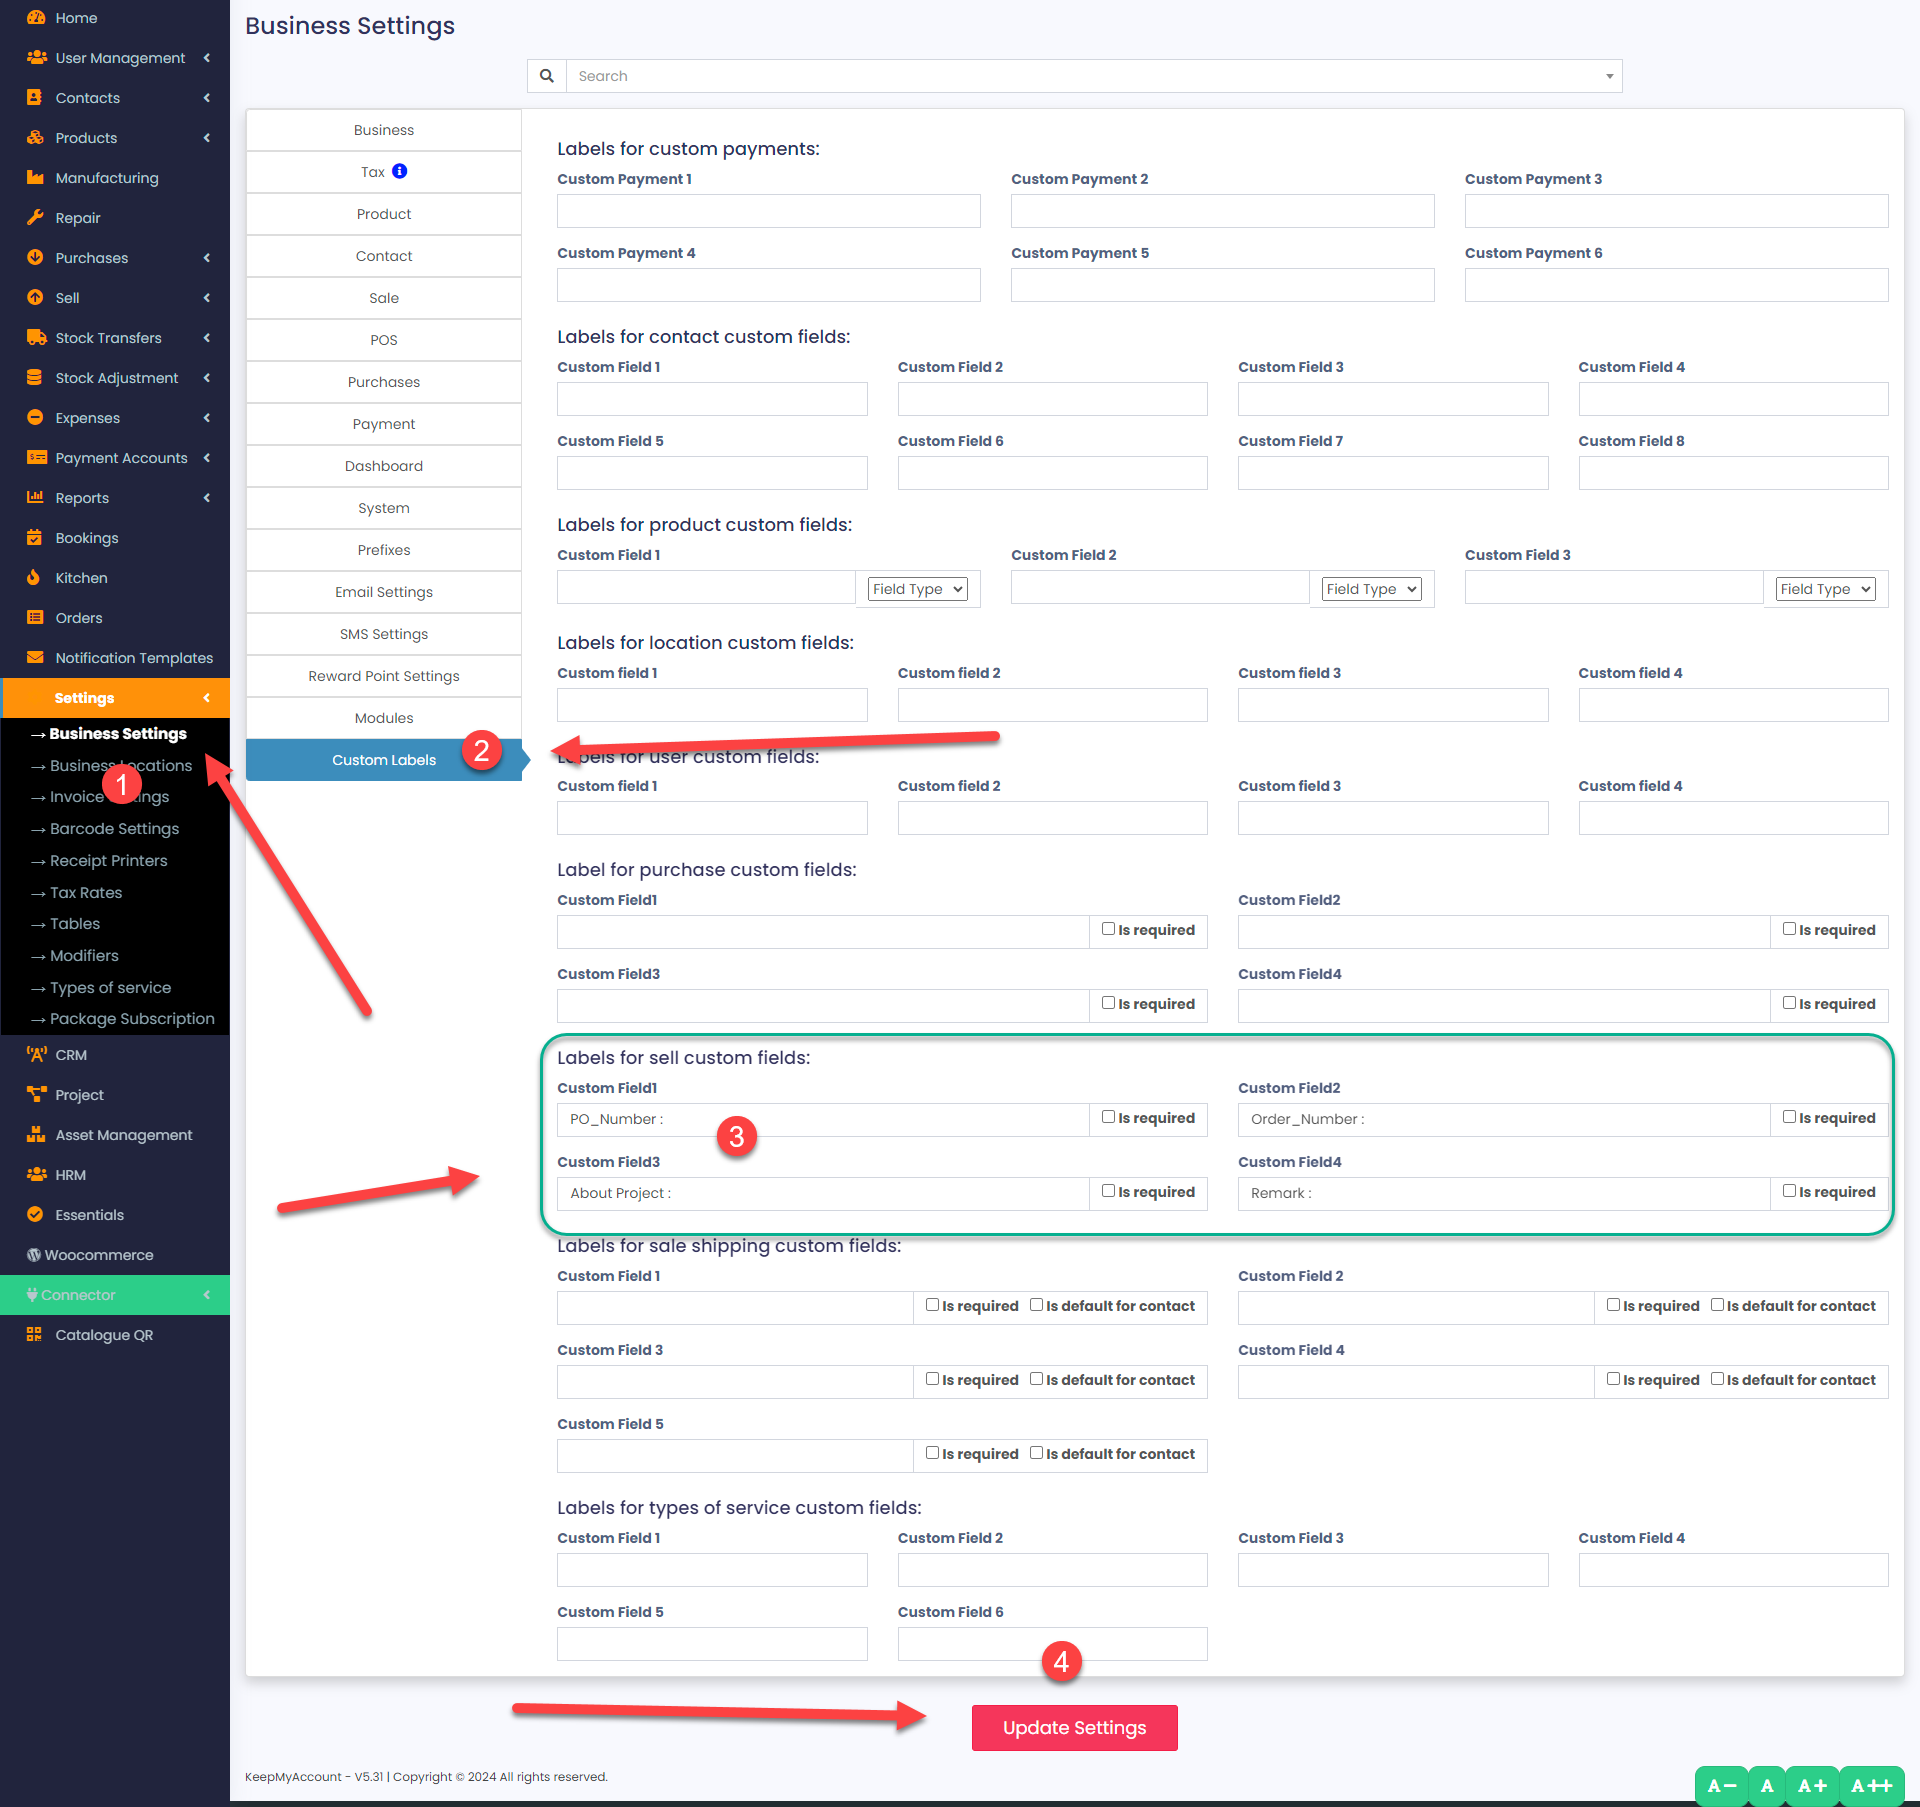
1. Go to Settings and enable the custom field See this Documentation .
2. Enter a name for your custom field, such as PO Number, Remark, or Project.

3. Choose whether you want the field to be mandatory or optional. If you make it mandatory, you will have to fill it in every time you make a sale. Then Click on Update Setting.
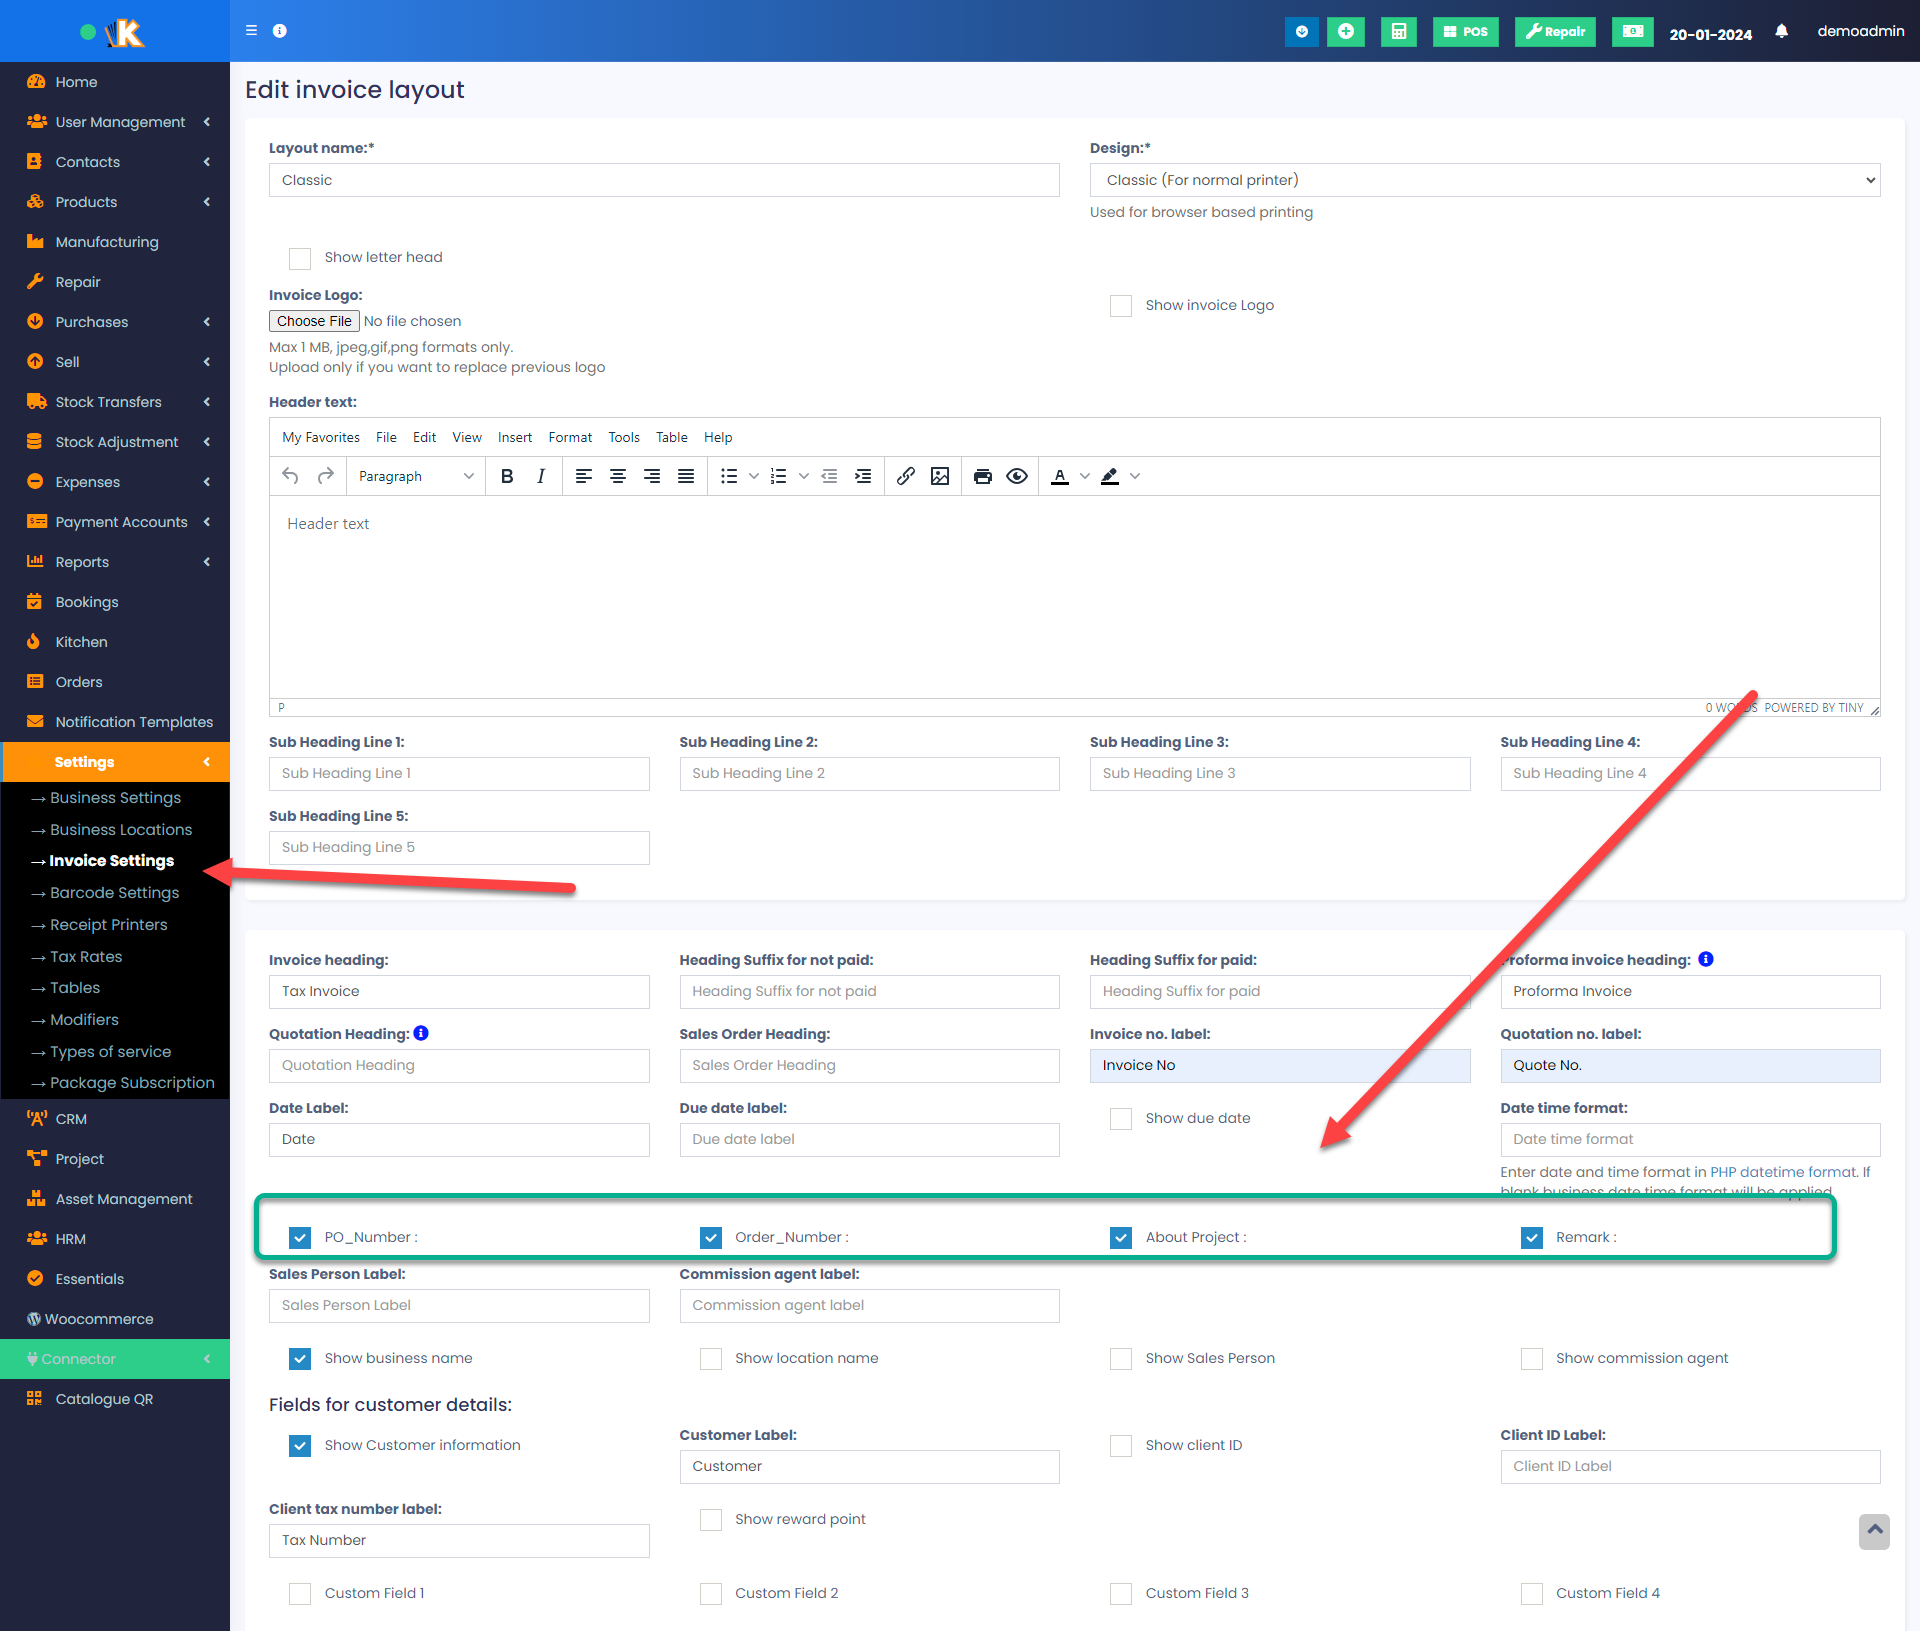
4. Once you have created the custom field, you need to enable it in your invoice settings. To do this, open your invoice settings and select the invoice layout you want to use.
5. After selecting the layout, you should see an option to enable custom fields. Click on this option and select the custom field you created earlier.
6. Once you have enabled the custom field, it should appear on your invoice. If it doesn’t appear, make sure that you have selected the correct invoice layout and that the custom field is enabled.
Please note that if you don’t enable the custom field in your invoice settings, it won’t show up when you print your invoice.
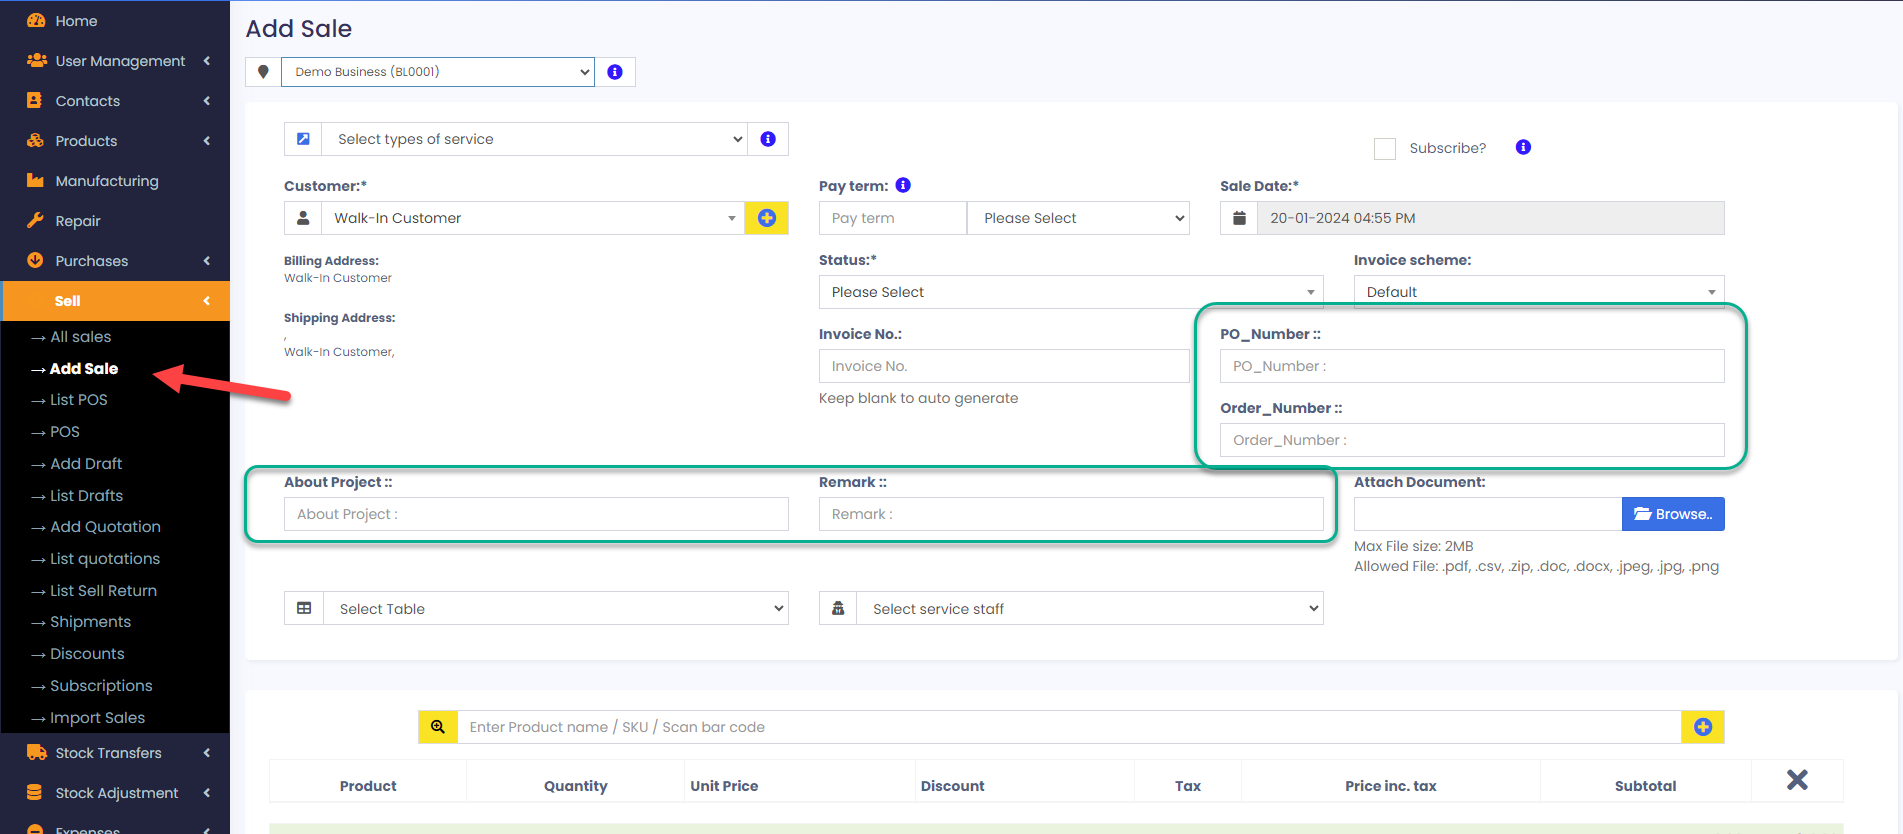
Now, when you go to the sales page, you will see your custom field below the customer name. You can enter any information you want in this field, such as a purchase order number, a remark, or a project name.
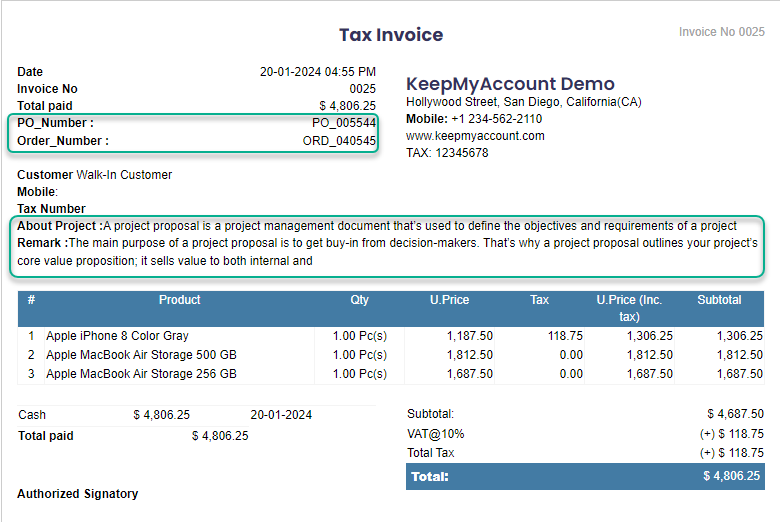
When you generate an invoice for your sale, the custom field information will appear below the customer details. You can also edit the invoice template to change the position or appearance of the custom field.


