Single Product: #
- – Product Type: Single
- Choose this option if your product has no variations
- Enter the default product price with or without tax
- Enter the profit margin percentage (you can set a default value in settings -> Business Settings)
- The selling price excluding tax will be calculated automatically based on the profit margin
- You can also enter the selling price manually and the profit margin will be adjusted accordingly
Variable Product: #
How to Create and Manage Product Variations #
If you sell products that have different options, such as size, color, design, or flavor, you need to create product variations in your store. Product variations allow you to display and manage all the possible combinations of your products, without having to create separate products for each option. This way, you can save time and avoid cluttering your product catalog.
we will show you how to create and manage product variations in your online store using our platform. We will also explain the benefits of using variation templates, which let you apply the same settings to multiple products with similar variations.
Step 1: Create a Variation Template
A variation template is a set of predefined variations that you can use for multiple products. For example, if you sell t-shirts that come in different sizes and colors, you can create a variation template with these options and apply it to all your t-shirt products.
To create a variation, go to Products -> Variations and click on the Add New button. Give your template a name and add the variation names and values that you want to include. For example, you can add Size as a variation name and S, M, L, XL as variation values. You can add as many variation names and values as you need.
Step 2: Assign a Variation to a Product
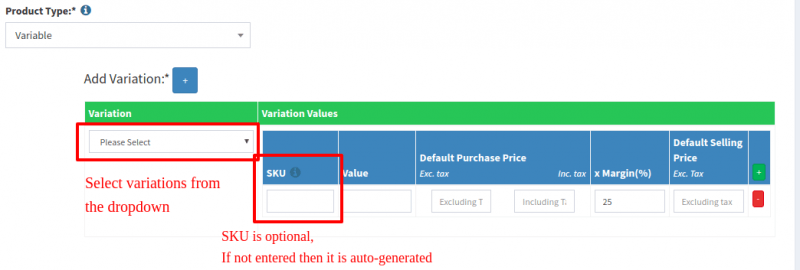
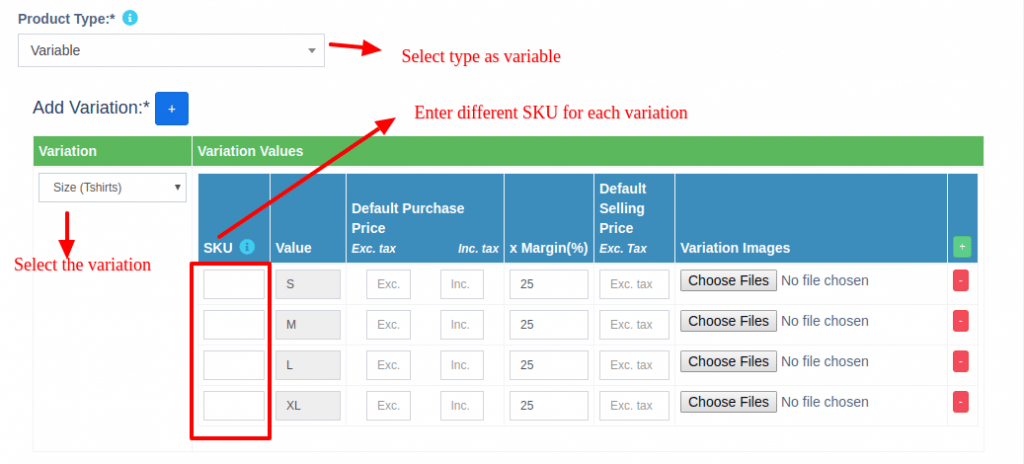
Once you have created a variation, you can assign it to any product that has the same options. To do this, go to Products -> All Products and edit the product to that you want to assign the template. Under the Product Data section, select Variable Product from the dropdown menu. Then, go to the Variations tab and select the template that you want to use from the dropdown menu. This will automatically populate all the possible combinations of variations for your product.
Step 3: Edit the Variation Details
After assigning a variation template to a product, you can edit the details of each variation, such as the purchase price, selling price, profit margin, stock status and image. To do this, click on the Expand button next to each variation and make the changes that you want.
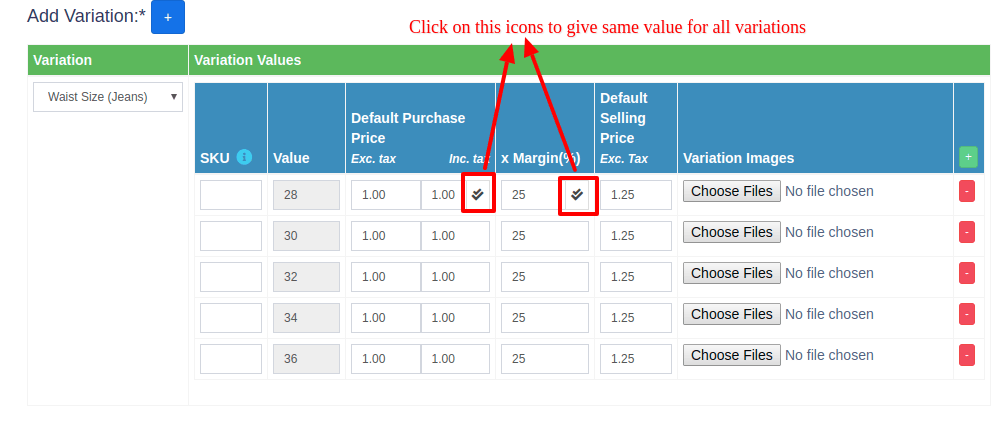
If you want to apply the same purchase price, selling price or profit margin to all variations of a product, you can use the double tick icon present in the first variation. This will copy the value from the first variation to all the other variations.
Step 4: Save and Preview Your Product
Once you have edited all the variation details, click on the Save Changes button at the bottom of the page. Then, you can preview your product by clicking on the View Product button at the top of the page. You will see that your product has a dropdown menu for each variation name, where customers can choose their preferred option. The price and image of the product will change according to the selected option.
Conclusion
Creating and managing product variations in your store is easy with our platform. You can use variation templates to save time and avoid duplication when adding products with similar options. You can also edit the details of each variation according to your needs.
If you want to learn more about adding variations to your products, you can read our detailed documentation here.
Combo or Bundle Product: #
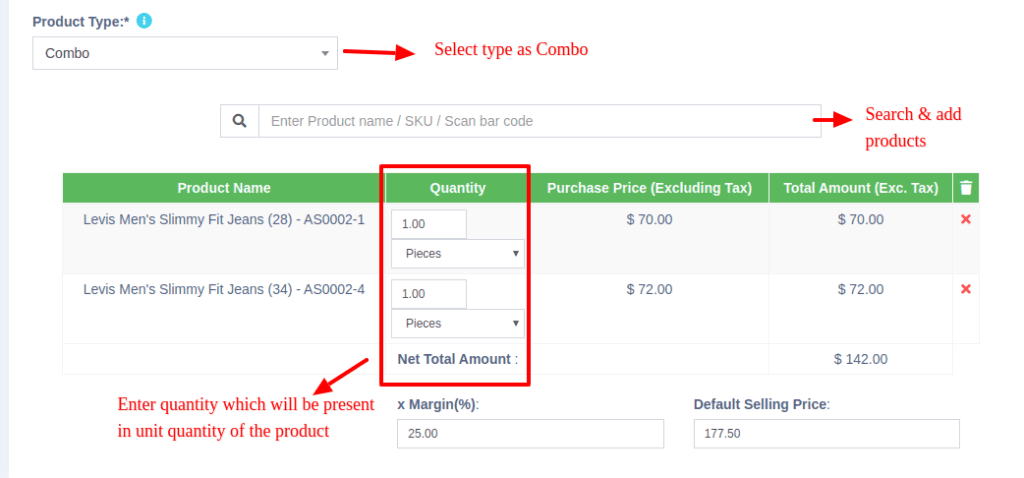
How to Create a Bundle Product in Your Store
If you want to offer your customers more value and convenience, you might want to consider creating a bundle product in your store. A bundle product is a combination of several products that are sold as one item. For example, you can create a bundle product called “Computer Set” that includes a PC monitor, a PC CPU, a PC keyboard, and a PC mouse. This way, your customers can buy everything they need in one click, instead of adding each product separately to their cart.
Creating a bundle product is easy and can help you increase your sales and customer satisfaction. Here are the steps to follow:
1. Go to Products > Add Product.
2. Select Bundle Product as the product type.
3. Enter the name, price, and description of the bundle product.
4. Click on Add Products to select the individual products that you want to include in the bundle.
5. For each product, enter the quantity and price that you want to charge in the bundle.
6. If you want to make the bundle customizable, check the box that says “Allow customers to choose products and quantities”.
7. Click on Save.
You have successfully created a bundle product in your store. You can see it in your product list and edit it anytime. You can also copy, export, or delete it if needed.
Note that the stock of your bundle product depends on the stock of the individual products that are included in it. For example, if you have 5 PC monitors, 4 PC CPUs, 10 PC keyboards, and 50 PC mice in your inventory, the stock of your “Computer Set” bundle product will be 4 units. When someone buys a “Computer Set” bundle product, the stock of each individual product will be automatically deducted.
You can also sell the individual products separately if you want. However, you cannot purchase a bundle product as a whole. Only the individual products that are included in it can be purchased.
Bundle products are a great way to offer more value and convenience to your customers and boost your sales. Try creating some bundle products in your store today and see the results for yourself!
Adding Products with multiple variations #
If you have products that involve multiple variations for example a Shirt can have Color & Size variations, then we have multiple ways to work with it:
Solution 1, Create combined variation: You can create a variation with the name “Color-Size” and add values like Red-Small, Red-Medium, Red-Large, etc. This way, you can easily select the appropriate option when you add the Shirt to your inventory.
Solution 2, Create multiple Products: You can also create separate products for each color of the Shirt, such as Shirt-Red, Shirt-Green, and Shirt-Blue. Then you can add size variations for each product. This method may be more suitable if you want to display different images or prices for each color. To save time, you can use the Duplicate Product action to copy the data from one product to another.
Select Required variations: #
Variable products are products that have different variations, such as color, size, or style. You can create variable products in your online store by following these steps:
– Go to the add/edit product screen and choose the product type as ‘variation’.
– Select the variation name from the dropdown menu. For example, if your product has different colors, select ‘color’ as the variation name.
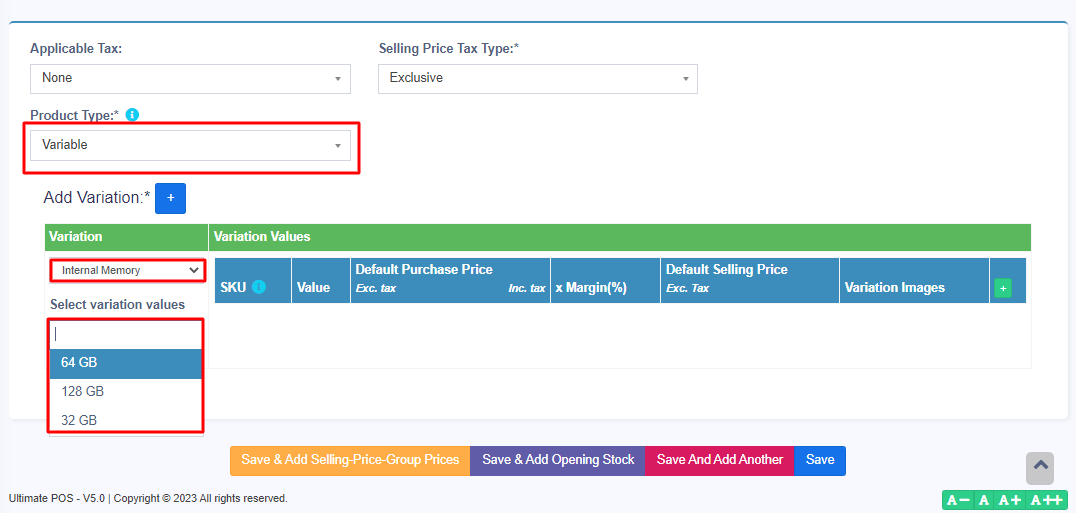
– A new dropdown menu will appear below the variation name, where you can select the required variation values. For example, if you want to offer your product in red, blue, and green colors, select those values from the dropdown menu.
– Repeat the steps for each variation name and value that you want to add to your product.
– Save your product and preview it on your store page.
By using variable products, you can offer more options to your customers and manage your inventory more efficiently.
