Sales Item Addition Method: #
- It has 2 options: “Add item in a new row” & “Increase item quantity if it already exists”
- This option is related to the POS & Sales screen when a new product is added.
- Add item in new row: It will always add a product to a new row
- Increase item quantity if it already exists: If the product already exists in the cart it will increase its quantity else it will add it in a new row.
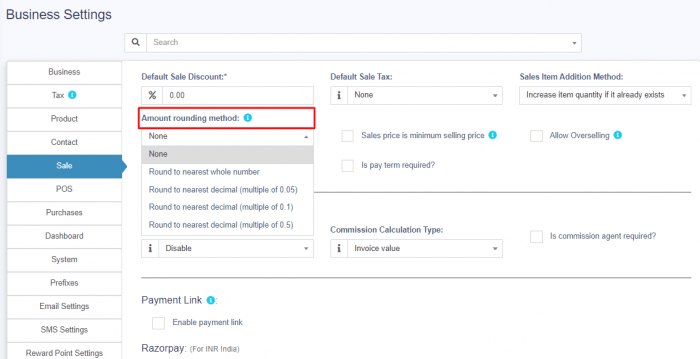
Amount rounding method: #
The price of the products can be taken as a whole number or as a rounded decimal value by selecting the particular roundoff method. If none is selected the value is taken as a whole number.
The sales price is the minimum selling price: #
One of the features of our product is the minimum selling price option. This option allows you to set a lower limit for the price of your product. When this option is enabled, you cannot sell your product below the minimum selling price that you have specified. However, you can still sell your product above the minimum selling price if you want to. This option helps you to protect your profit margin and avoid price wars with competitors.
Enable Sales Order: #
How to Use the Sales Order Feature:
If you want to track your sales transactions and manage your inventory more efficiently, you can use the sales order feature in our software. A sales order is a document that records the details of a customer’s order, such as the items, quantities, prices, and delivery date. A sales order also helps you reserve the inventory for the customer until you ship the order or invoice it.
To use the sales order feature, you need to enable it first in the settings. Here are the steps to do that:
- Go to Settings > Sales > Sales Order.
- Toggle the switch to ON.
- Click Save.
You have now enabled the sales order feature. You can start creating and managing your sales orders from the Sales tab.
Detailed Information Please Open the sales order Page.
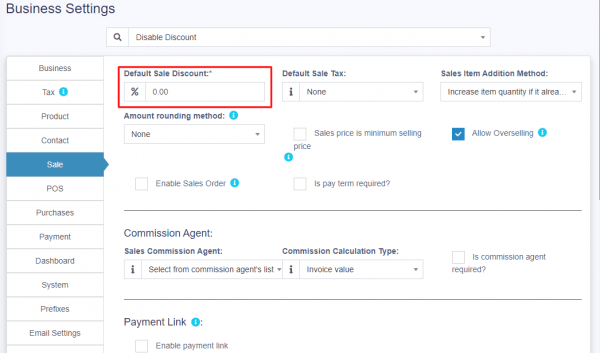
Default Sale Discount: #
One of the features that can help you boost your sales is the default sale discount. This is a percentage off that you can apply to all or some of your products in one go. You can set up the default sale discount in Business Settings -> Sale. Here you can choose which products to include in the sale, how much to discount them by, and how long the sale will last. You can also customize the sale banner that will appear on your product pages. The default sale discount is a great way to attract more customers and increase your revenue. You can use it for seasonal promotions, clearance sales, or special events. You can also change or remove the default sale discount at any time.
Enable inline Tax: #
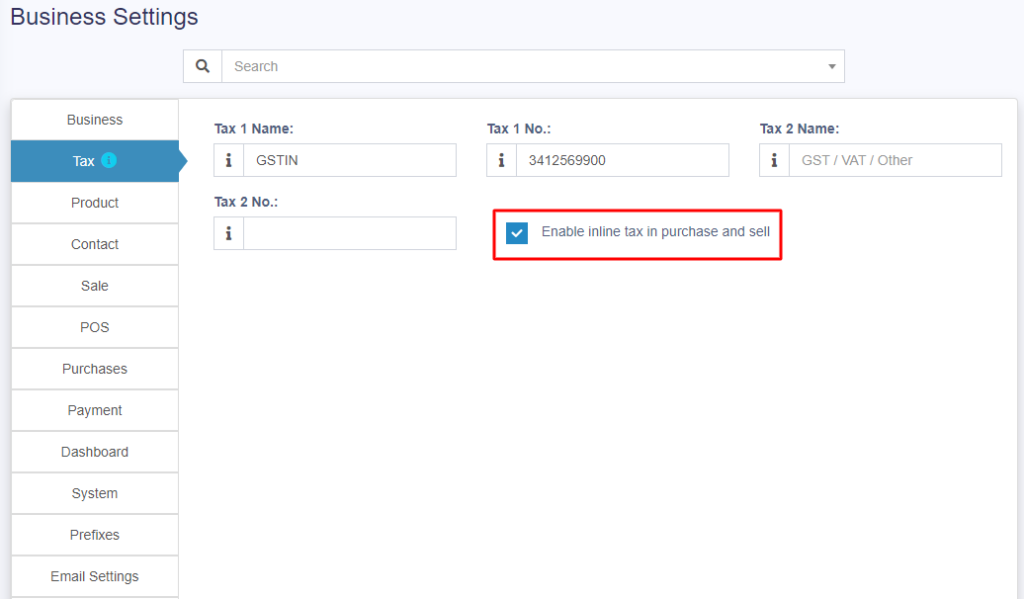
How to Show the Price with Tax on the POS Screen
If you want to see the price including tax on the point of sale screen, you need to activate a simple option in the Business Settings. Go to the Tax section and tick the box that says “Enable inline Tax“. This will apply the tax rate to the price and show it on the POS screen. This way, you can easily calculate the total amount to charge your customers and avoid any confusion or errors.
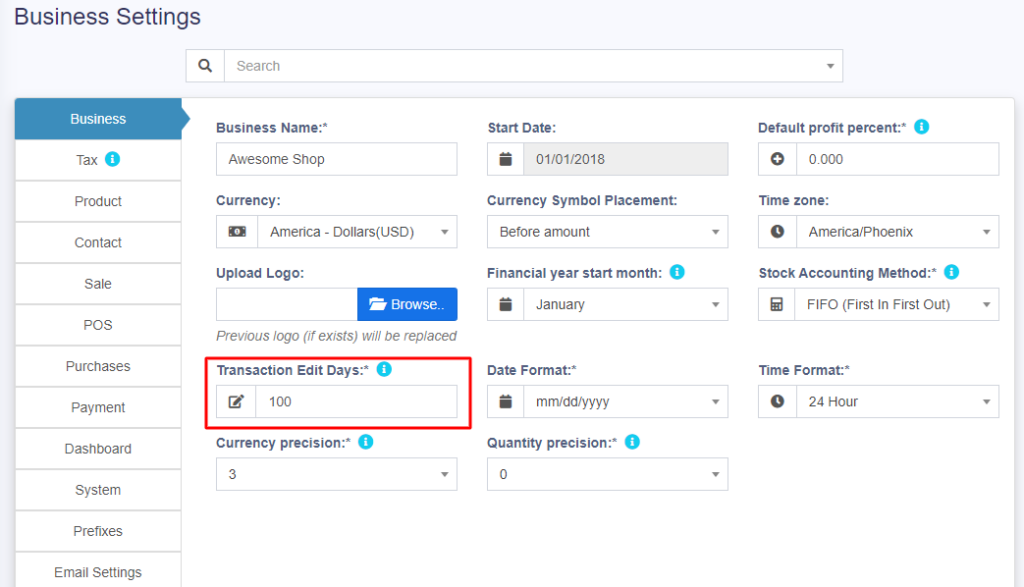
Change your Transaction Edit Days: #
How to edit transactions for more than 30 days?
If you need to make changes to your transactions that are older than 30 days, you can do so by adjusting the settings in your business account. This will allow you to edit the transactions as per your requirements. Here are the steps to follow:
- Log in to your business account and go to the Settings menu.
- Click on the Transactions tab and find the option that says “Maximum number of days for editing transactions”.
- Enter the number of days you want to extend the limit to and click on Save.
- You can now edit your transactions that are within the new limit.
Note: Editing transactions that are older than 30 days may affect your reports and tax calculations. Make sure you review the changes carefully before saving them.
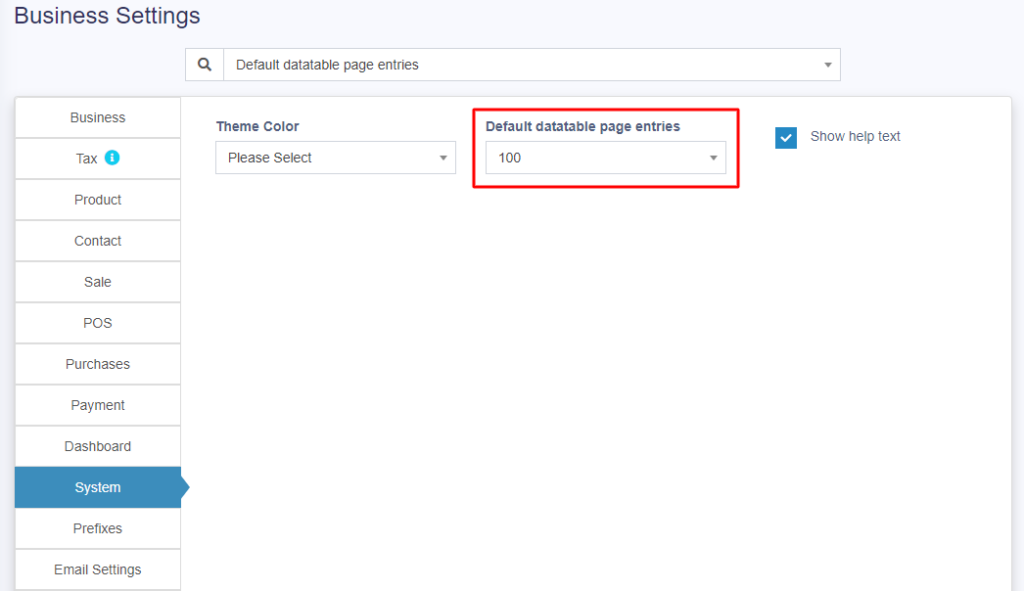
Datatable Entry Selection: #
If you want to customize the data tables in your business dashboard, you can easily change the number of entries that are displayed by default. This can help you to view and manage your data more efficiently and conveniently. To do this, you need to go to Business Settings -> System and select the desired number of entries from the drop-down menu. You can choose between 10, 25, 50, or 100 entries per page. This setting will apply to all the data tables in your dashboard, such as customers, orders, products, etc. You can also change the number of entries on each table individually by using the pagination controls at the bottom of the table.
